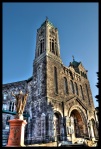
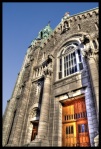
A quick post to upload my most recent HDRs of two churches not far away from my new appartment. These shots were taken awhile back, but I decided to follow this great tutorial to see what I could come up with. As mentionned in previous posts, I sometimes end up with halos around buildings in my HDRs, especially when maxing out strength, microcontrast, and reducing smoothing to its minimum, and this tutorial shows a pretty good way to get rid of them. Besides I also like having a natural-looking sky instead of the weird under-exposed fake-looking contrast-lacking dark blue one photomatix sometimes renders, as it was the case with these church pics.
As always, I had some issues to overcome. I generated the HDRs from a single RAW file, but each time photomatix rendered an image a little bigger than the original. Scary eh ? Well the point is, I didn’t realise until I had started selecting the sky in the first pic that the HDR and the original weren’t exactly aligned. As a result, I still had a little of the HDR sky on the left side of the building, whereas the sky was overlapping a bit of the church on the right side. Hence the soft halo on the left side of the bell tower and the apparent lack of sharpness and darker halo on the right of the building. The second HDR is better, I made sure both images were aligned and tried a lot of different feather/expansion settings to refine my selection, but despite my efforts the left of the building looks a bit strange, the bricks near the corner tend to look lighter than the rest and the sky right next to them is a bit darker. I guess I still suck at photoshop ;).

